My verdict : Itlog Na Maalat/Salted egg

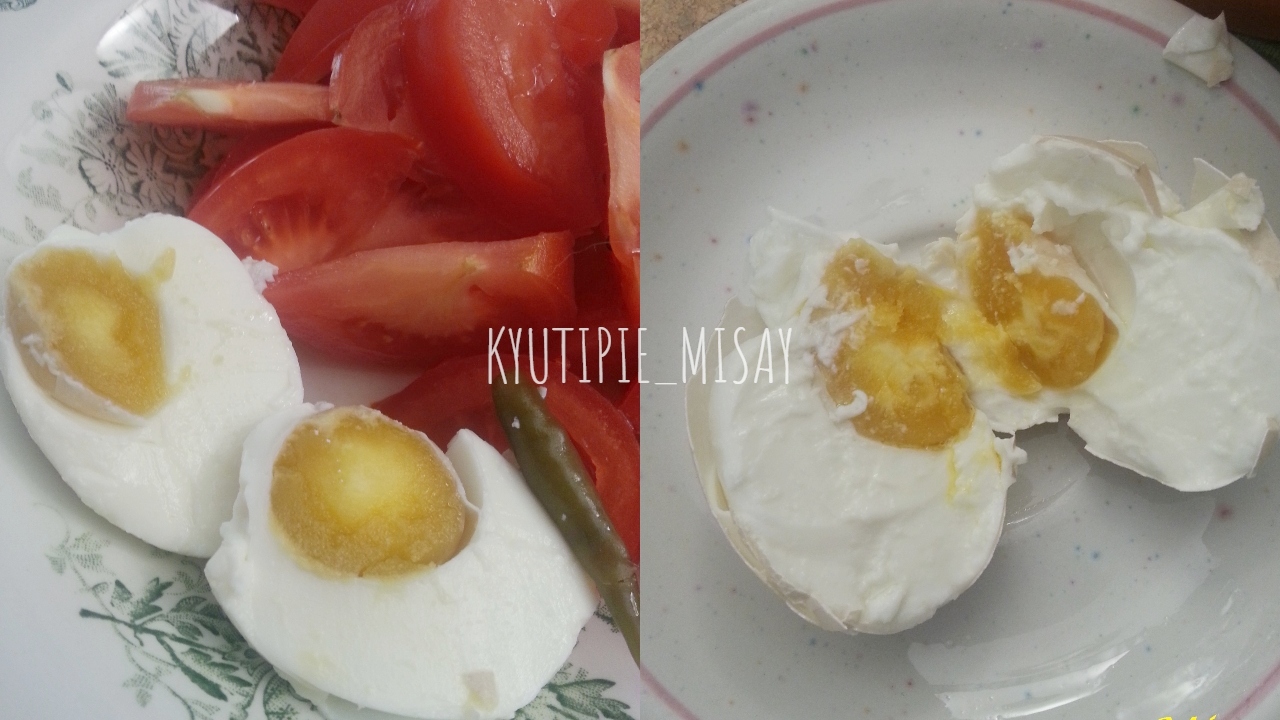
This is it!…been 25 days now since I made my itlog na maalat (salted egg) and now it’s time to do some taste taste :).

As you all know I used chicken eggs instead of the usual duck eggs, so I was a little bit worried that I might just get a dry yolk rather than the oily one which is usually do happened when you use the chicken eggs. But anyway, as I search online (of course I ask MR. Google LOL) if its possible for me to attain the oily yolk even if I use different eggs or is there any method that I can use to make them as oily as possible like the one we buy in the store.

check the date!

Searching, searching and searching till I found one answer! yes i found one!! and it’s so easy to do I read her blog and it’s really interesting too. She did the brine method and also she used chicken eggs like me!(see picture below the result) ๐Ÿ™‚ My Itlog na maalat!!


Continue reading “My verdict : Itlog Na Maalat/Salted egg”

HOME MADE PORK SHANGHAI (spring rolls)

Lumpiang shanghai is one of my favorite easy to make pinoy fika-fika food. It is also a common dish during celebrations (birthday,new year, Christmas or simple meryenda in the Philippines). It is best if combined with sweet and sour sauce or a ketchup. It also best paired in rice, pancit or spaghetti ๐Ÿ™‚

I just want to share to you guys how to make a simple pork shanghai. All of the ingredients can easily be found in any supermarket. Its easy to make.

my simple pork shanghai ๐Ÿ™‚ hmmm yummy!!!

My Pork Shanghai Ingredients:

๐Ÿ‘ฉโ€๐Ÿณ 1/4 ground pork
๐Ÿ‘ฉโ€๐Ÿณ 1 big onion (minced)
๐Ÿ‘ฉโ€๐Ÿณ 5 cloves of garlic (minced)
๐Ÿ‘ฉโ€๐Ÿณ 1 Big carrot (finely chopped)
๐Ÿ‘ฉโ€๐Ÿณ salt
๐Ÿ‘ฉโ€๐Ÿณ ground pepper
๐Ÿ‘ฉโ€๐Ÿณ 2 egg
๐Ÿ‘ฉโ€๐Ÿณ 1 whole celery (this is optional using this will makes your shanghai smells good)
๐Ÿ‘ฉโ€๐Ÿณ 50 pcs shanghai roll (you can find shanghai roll in any supermarket, usually you can find it in any ASIAN stall of the grocery.)


Continue reading “HOME MADE PORK SHANGHAI (spring rolls)”

BLOGGER HELP: HOW TO CENTER POST TITLES IN BLOGGER

ย 

Have you ever wondering how you can make your Blogger Post Title and Date goes into the center of your post (see picture below). So Here is my simple and quick tutorial on how you can center your Blog Title Postย and do it all through the basic template editor in your Blogger.ย Just paste some codeย ๐Ÿ˜‰ to the CSS section in the Template design! and off to go! your post is in the center now!

HOW TO DO ITย ๐ŸŒป

๐ŸŒป Make sure you logged in to your Blogger account
๐ŸŒป Go to yourย Themeย section that you can see on the left side
๐ŸŒป Then Click theย Customizeย button
๐ŸŒป Then go to theย Advanceย section on the left
๐ŸŒป Just Scroll down and look forย Add CSS
๐ŸŒป Then paste the code ( see picture below)

Once you are in there, you’re going to add the following codes. Simply copy/paste them into the Add CSS fields and you’ll see that the format will immediately apply into your page. Just don’t forget to click the “Apply to Blog” to save itย ๐Ÿ˜‰.

Copy and paste the code on your CSS

CODE TO CENTER YOUR TITLE POST ๐ŸŒป

.post-title {
text-align:center;
}

.date-header {
text-align:center;

}
Code to center your Gadget Headers in Blogger:
.widget {
ย  text-align: center;
}

ย Code to center your Tabs in Blogger:
.PageList {text-align:center !important;}
.PageList li {display:inline !important; float:none !important;}

Don’t forget to Save!

You can also leave out any of these if you want and just pick and choose which things you want to centered and which you do not. Hope my simple tutorial helps you guys! for a beginner like me this simple tutorial is really a big help! Let me know if you guys like your new format. Tap my back and say thanks hihihi ๐Ÿ’œ๐Ÿ’‹


Continue reading “BLOGGER HELP: HOW TO CENTER POST TITLES IN BLOGGER”